


Road cycling strategies for climbing, pacing, and staying comfortable with a focus on posture for weekend rides Leave a comment
Road cycling strategies for climbing, pacing, and staying comfortable with a focus on posture for weekend rides
Climbing efficiently, pacing yourself wisely, and maintaining comfort are essential for enjoyable and sustainable weekend road rides—especially when tackling hills. The right road cycling strategies for climbing, pacing, and staying comfortable with a focus on posture can make the difference between a rewarding ride and an exhausting ordeal. This guide breaks down practical techniques to help you ride stronger, recover faster, and enjoy every mile, whether you’re grinding up a local hill or cruising through rolling countryside.
Why Posture Matters on the Bike
Good posture isn’t just about comfort—it directly affects your power output, breathing efficiency, and injury risk. When your body is aligned correctly, you transfer energy more effectively from your legs to the pedals, reduce strain on your back and neck, and maintain better control over rough terrain.
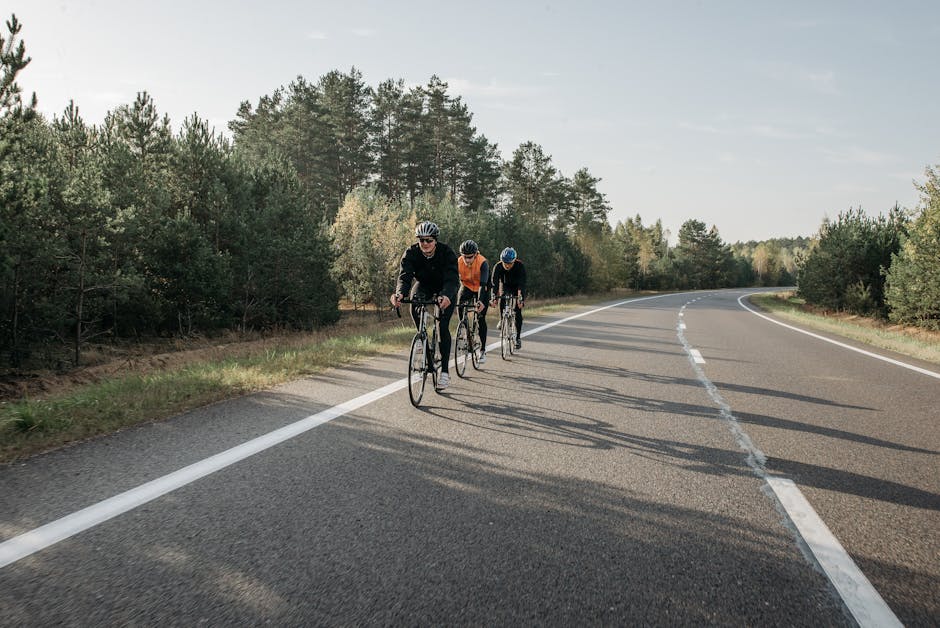
A common mistake among weekend riders is adopting a hunched or overly aggressive position, especially when tired. This not only limits your lung capacity but also increases fatigue in your shoulders and lower back. Instead, aim for a neutral spine: imagine a straight line from your head through your spine to your hips. Your elbows should be slightly bent, shoulders relaxed, and hands resting lightly on the hoods or tops of the handlebars.
For climbing, posture becomes even more critical. Leaning too far forward can overload your hands and wrists, while sitting too upright reduces traction on the rear wheel. The ideal climbing posture keeps your weight centered over the bottom bracket, allowing smooth pedal strokes and balanced handling.
Mastering Climbing Technique
Climbing is as much a mental challenge as a physical one. The key is consistency—avoid surging and sudden bursts of effort that drain your energy quickly. Instead, focus on steady, controlled power delivery.
Seated vs. Standing Climbs
Most climbs are best approached seated, especially on gradients under 8%. Sitting keeps your center of gravity lower, improves rear-wheel grip, and allows for more efficient pedaling. Use a gear that lets you maintain a cadence of 70–90 RPM—this range balances muscle fatigue and cardiovascular strain.
Standing is useful for short, steep sections or when you need to stretch your back and hips. When standing, keep your pedals level, shift your weight slightly back, and use your core to stabilize your upper body. Avoid rocking the bike excessively—this wastes energy and can throw off your balance.
Gear Selection and Cadence
Choosing the right gear is crucial. If you’re spinning out (cadence too high), shift up. If you’re grinding (cadence too low), shift down. A compact crankset (50/34) paired with an 11-32 cassette offers a wide range for most weekend riders, making steep climbs manageable without sacrificing speed on flats.
Example: On a 6% gradient, a cadence of 80 RPM in a 34×28 gear feels sustainable for most riders. Pushing a 34×24 at 60 RPM may feel powerful initially but leads to premature leg fatigue.
Pacing Strategies for Longer Rides
Pacing is about managing your energy over time. Going too hard at the start leads to burnout; going too easy leaves performance on the table. The goal is even effort distribution.
Use Perceived Exertion and Heart Rate
Two reliable tools for pacing are perceived exertion (how hard you feel you’re working) and heart rate monitoring. On a scale of 1 to 10, aim to stay between 5 and 7 during steady climbs. Your heart rate should remain in your aerobic zone—typically 70–80% of your maximum.
If your heart rate spikes quickly on a climb, ease off slightly. It’s better to finish strong than to collapse at the summit. Use descents and flat sections to recover, not to rest completely—keep spinning at an easy pace to promote blood flow.
The 10% Rule
A simple pacing guideline: don’t increase your average power output by more than 10% from one climb to the next. For example, if you average 180 watts on a 5-minute climb, avoid pushing 200+ watts on the next unless it’s significantly shorter or less steep.
This rule helps prevent cumulative fatigue, especially on rides with multiple climbs. It’s easy to get caught up in the moment and overextend, but disciplined pacing pays off in the final miles.
Staying Comfortable on Weekend Rides
Comfort extends beyond saddle sores and chafing. It includes hand numbness, lower back pain, knee strain, and overall ride enjoyment. Many discomforts stem from poor bike fit or improper technique.
Bike Fit Essentials
A proper bike fit is the foundation of comfort. Key adjustments include:
- Saddle height: When your heel is on the pedal at the bottom of the stroke, your leg should be straight. This ensures optimal leg extension without overreaching.
- Saddle position: Your knee should align vertically with the pedal spindle when the crank is at 3 o’clock. Too far forward increases knee stress; too far back reduces power.
- Handlebar reach: You should be able to rest your hands on the hoods with a slight bend in your elbows and relaxed shoulders. Overreaching strains the neck and back.
Even small adjustments—like lowering the stem by 10mm or tilting the saddle slightly down—can dramatically improve comfort over long rides.
Clothing and Equipment
Invest in quality padded cycling shorts. The chamois (padding) should fit snugly without seams that rub. Avoid wearing underwear—it creates friction and moisture buildup.
Gloves with gel padding reduce hand numbness by absorbing road vibration. On longer rides, consider gloves with extra padding on the palms and fingers.
Tires also play a role. Wider tires (25–28mm) at lower pressures (around 80–90 psi for a 170 lb rider) absorb more shock than narrow, high-pressure tires, improving comfort without sacrificing speed.
Breathing and Core Engagement
Many riders forget that breathing is part of technique. Shallow chest breathing limits oxygen intake and increases fatigue. Practice diaphragmatic breathing: inhale deeply through your nose, expanding your belly, then exhale fully through your mouth.
Engaging your core—tightening your abdominal muscles slightly—stabilizes your torso, especially when climbing or riding out of the saddle. Think of your core as a brace that keeps your upper body still while your legs drive the pedals.
A strong core also reduces lower back strain. If you feel your back rounding or your shoulders tensing, take a moment to reset: sit up, take a deep breath, and gently tighten your abs.
Hydration and Nutrition for Sustained Effort
Even on weekend rides under three hours, dehydration and low glycogen can impair performance. Aim to drink 500–750ml of water or electrolyte drink per hour, sipping regularly rather than gulping.
For rides over 90 minutes, consume 30–60 grams of carbohydrates per hour. Energy gels, bananas, or granola bars work well. Avoid high-fat or high-fiber snacks—they digest slowly and can cause stomach discomfort.
Example: On a 2.5-hour ride with two climbs, drink one bottle of electrolyte mix and eat one gel and a banana. This provides roughly 50g of carbs and maintains hydration.
Mental Strategies for Tough Climbs
Climbing is as much about mindset as fitness. Break long climbs into smaller segments. Focus on reaching the next bend, tree, or landmark rather than the summit. This makes the effort feel more manageable.
Use positive self-talk. Instead of “This is too hard,” try “I’m strong, I’ve trained for this.” Visualize smooth pedal strokes and steady breathing.
Riding with others can also help. Drafting behind a partner reduces wind resistance and provides motivation. Even on climbs, staying close (within 1–2 bike lengths) can make a noticeable difference in effort.
Recovery Between Rides
Comfort and performance improve not just during the ride, but after. Post-ride recovery helps your body adapt and reduces soreness.
- Stretch: Focus on hamstrings, quads, hip flexors, and lower back. Hold each stretch for 20–30 seconds.
- Refuel: Within 30–60 minutes, consume a mix of protein and carbs (e.g., chocolate milk, yogurt with fruit).
- Rest: Allow at least one rest day between hard rides. Light spinning or walking promotes circulation without adding strain.
Ignoring recovery leads to cumulative fatigue, increasing injury risk and reducing enjoyment.
Common Mistakes to Avoid
Even experienced riders fall into bad habits. Watch out for these:
- Gripping the handlebars too tightly: This causes hand numbness and shoulder tension. Keep a light grip, especially on climbs.
- Pedaling in too high a gear: Grinding at low cadence strains knees and burns energy quickly.
- Neglecting bike maintenance: Worn chains, underinflated tires, or misaligned brakes make riding harder and less safe.
- Skipping warm-up: Start with 10–15 minutes of easy spinning to prepare muscles and cardiovascular system.
Putting It All Together: A Sample Weekend Ride Plan
Imagine a 60-mile ride with three moderate climbs. Here’s how to apply these strategies:
- Pre-ride: Check tire pressure (85 psi), fuel with a light breakfast (oatmeal + banana), and hydrate.
- First 20 miles (flat): Warm up at an easy pace (Zone 2 heart rate). Focus on smooth pedaling and relaxed posture.
- First climb (5% gradient, 2 miles): Shift to an appropriate gear, stay seated, maintain 80 RPM. Breathe deeply and keep shoulders down.
- Descent: Relax, hydrate, and stretch your hands. Use this time to recover.
- Middle section: Maintain steady pace. Eat a gel and drink 200ml of water.
- Second climb (steeper, 7%): Stand briefly if needed, but return to seated position. Focus on rhythm, not speed.
- Final 15 miles: Monitor fatigue. If legs feel heavy, ease the pace slightly. Save energy for the last climb.
- Post-ride: Stretch, refuel, and inspect your bike for any issues.
Final Thoughts
Effective road cycling strategies for climbing, pacing, and staying comfortable with a focus on posture aren’t about extreme effort—they’re about smart, consistent habits. By refining your technique, listening to your body, and preparing properly, you’ll ride farther, recover faster, and enjoy every weekend adventure. Remember: the best climbs aren’t the fastest—they’re the ones you finish feeling strong.
FAQ
How can I improve my climbing posture without a professional bike fit?
Start with basic adjustments: ensure your saddle height allows a straight leg when the pedal is at the bottom, and your handlebars aren’t too low or far forward. Record yourself riding from the side to check if your back is flat and your elbows are slightly bent. Small tweaks can make a big difference.
What’s the best way to pace myself on a hilly ride?
Use perceived exertion and heart rate as guides. Stay in your aerobic zone (70–80% max HR) and avoid surging on climbs. Apply the 10% rule—don’t increase power output by more than 10% from one climb to the next—to prevent early fatigue.
How often should I eat and drink on a 3-hour weekend ride?
Aim to drink 500–750ml of fluid per hour and consume 30–60 grams of carbohydrates. Sip water regularly and eat small snacks like gels or bananas every 45–60 minutes to maintain energy and hydration.