


Road Cycling Guide to Better Speed, Comfort, and Control on Long Rides with a Focus on Value for Weekend Rides Leave a comment
Road Cycling Guide to Better Speed, Comfort, and Control on Long Rides with a Focus on Value for Weekend Rides
Long weekend rides should feel rewarding, not punishing. Whether you’re covering 50 or 100 miles, the right approach to gear, positioning, and pacing can dramatically improve your speed, comfort, and control—without breaking the bank. This road cycling guide delivers practical, value-focused strategies to help you ride farther, faster, and more confidently on your next weekend adventure. From smart bike setup to efficient nutrition, every tip is chosen with real-world performance and affordability in mind.
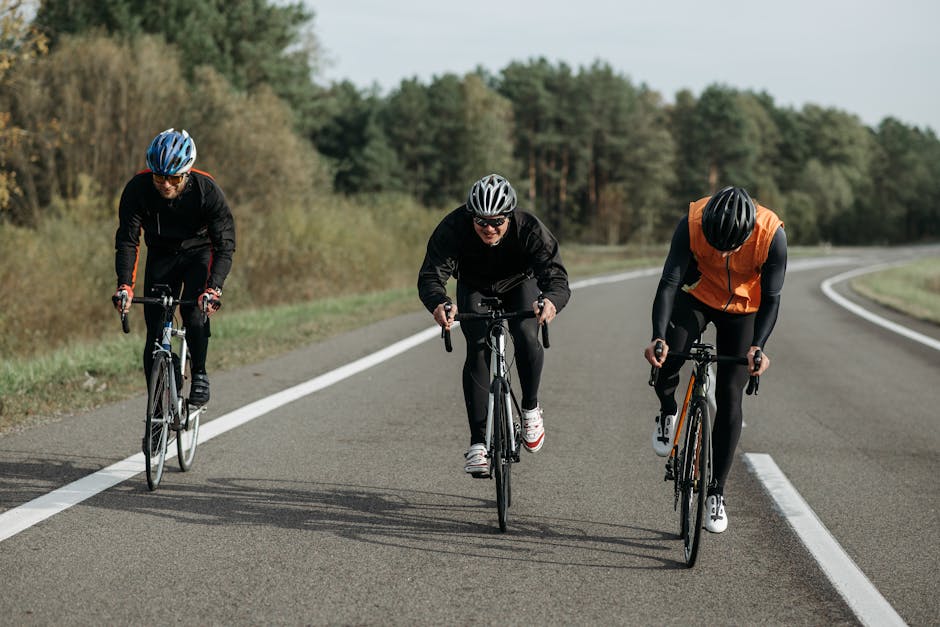
Why Comfort and Control Matter More Than Raw Speed
Many riders chase speed by buying lighter wheels or aerodynamic frames, but long-term enjoyment and performance come from comfort and control. A bike that fits well and handles predictably lets you maintain a steady pace with less fatigue. On a 60-mile ride, a poorly positioned rider may lose 10–15% efficiency due to unnecessary strain, while a well-set-up bike allows smoother power transfer and better handling through corners and descents.
Focus first on stability and endurance. A comfortable saddle, relaxed upper body, and balanced weight distribution reduce soreness and increase confidence—especially on rough roads or unexpected obstacles. Speed naturally follows when you’re not fighting discomfort or fear of losing control.
Get the Right Bike Fit Without the Premium Price Tag
Professional bike fits can cost $150–$300, but you can achieve 90% of the benefit with careful self-adjustment. Start with these three key measurements:
- Saddle height: Sit on the saddle with your heel on the pedal at the bottom of the stroke. Your leg should be fully extended. When you switch to the ball of your foot, there should be a slight bend in the knee.
- Saddle fore-aft position: With the crank horizontal, your forward knee should align vertically with the pedal spindle. Use a plumb line or a weighted string to check.
- Handlebar reach and drop: Your elbows should be slightly bent when holding the drops, and your back should form a 45-degree angle. Too much reach causes shoulder pain; too little reduces power.
Use a smartphone level app or a simple ruler to fine-tune adjustments. Even small changes—like lowering the stem by 10mm—can make a noticeable difference in comfort over two hours of riding.
For most weekend riders, a $500–$1,000 road bike with a quality aluminum frame and Shimano 105 groupset offers the best balance of durability, performance, and value. Avoid carbon frames unless you’re consistently riding 100+ miles weekly—they’re lighter but more fragile and costly to repair.
Upgrade Smart: Components That Deliver Real Value
Not all upgrades are worth the investment. Focus on parts that directly affect comfort, control, and long-ride efficiency. Here’s a prioritized list based on cost-to-benefit ratio:
| Component | Recommended Upgrade | Typical Cost | Impact on Ride |
|---|---|---|---|
| Tires | 28–32mm tubeless or clincher with puncture protection | $50–$80 | High: Smoother ride, fewer flats, better grip |
| Saddle | Mid-width, cutout design (e.g., Selle Italia Diva, Fizik Arione) | $80–$120 | High: Reduces numbness and improves comfort |
| Handlebar tape | Gel-padded or double-wrapped tape | $20–$40 | Medium: Absorbs vibration, improves grip |
| Pedals | Mid-range clipless (e.g., Shimano PD-R550) | $70–$100 | Medium: Efficient power transfer, reliable release |
| Wheels | Lightweight alloy (e.g., Mavic Aksium, DT Swiss P1800) | $300–$500 | Medium-High: Better acceleration and ride quality |
Tires are the most impactful upgrade. Switching from 23mm to 28mm tires at a lower pressure (around 70–80 psi for a 160 lb rider) reduces road vibration by up to 30%, according to independent testing. Wider tires also improve cornering grip, which enhances control on descents and wet roads.
Avoid expensive electronic groupsets or deep-section carbon wheels unless you’re racing. For weekend rides, mechanical shifting and standard wheels offer 95% of the performance at half the cost.
Master the Fundamentals of Efficient Pedaling
Speed on long rides comes from consistency, not bursts of power. A smooth, circular pedal stroke saves energy and reduces joint stress. Focus on these three techniques:
- Maintain a steady cadence: Aim for 80–90 RPM. Use a cheap cadence sensor ($20–$30) to monitor your rhythm. Shifting gears to stay in this range prevents burnout.
- Pull up slightly on the upstroke: Think of “scraping mud off your shoe” as your foot rises. This engages hamstrings and glutes, distributing effort across more muscles.
- Use your core, not just your legs: Engage your abdominal muscles to stabilize your upper body. This reduces bouncing and improves power transfer.
Practice these on flat roads before tackling hills. Over time, efficient pedaling can increase your average speed by 2–3 mph without increasing perceived effort.
Optimize Your Riding Position for Endurance
Your body position affects aerodynamics, comfort, and control. On long rides, prioritize endurance over aggressive aerodynamics. A slightly more upright posture reduces neck and lower back strain while maintaining good speed.
Adjust your handlebar height so your back is at 45 degrees when in the drops. If you can’t comfortably reach the brakes or feel numb in your hands, raise the bars by 10–20mm. Use spacers under the stem to fine-tune.
For extra comfort, consider compact handlebars with a shorter reach and shallower drop. These are easier on the shoulders and allow quicker hand transitions between hoods and drops.
Fuel and Hydrate Like a Pro (Without the Pro Budget)
Nutrition is often overlooked but critical for maintaining speed and focus. Aim to consume 30–60 grams of carbohydrates per hour and drink 500–750ml of water per hour, depending on temperature and intensity.
Homemade energy gels are a cost-effective alternative. Mix 1 cup water, 1/2 cup honey, 1/4 cup orange juice, and a pinch of salt. Store in small zip-top bags. Each serving provides ~25g carbs and electrolytes for under $0.50.
Use insulated bottles to keep drinks cool. A $15 insulated bottle keeps water 10–15°F cooler than standard bottles over a 3-hour ride—important for staying hydrated in summer.
Avoid sugary sports drinks unless riding over 2 hours. Plain water with electrolyte tablets (like Nuun) or homemade mixes prevent energy crashes and cost less per ride.
Improve Control Through Smart Braking and Cornering
Confidence in corners and descents comes from technique, not just bike specs. Use both brakes evenly—70% rear, 30% front—when slowing down. The front brake provides more stopping power, but using it too aggressively can cause skidding or loss of control.
When cornering, lean the bike, not your body. Keep your outside pedal down and apply light pressure. Look through the turn to where you want to go—your body will naturally follow.
On wet or gravel-strewn roads, reduce speed before the corner, not during. Braking mid-turn reduces traction and increases the risk of sliding.
Maintain Your Bike to Prevent Breakdowns
A well-maintained bike is safer, faster, and more reliable. Perform these checks before every long ride:
- Tire pressure: Check with a floor pump with a gauge. Underinflated tires increase rolling resistance; overinflated ones reduce grip.
- Brake pads: Inspect for wear and alignment. Replace if less than 1mm thick or unevenly worn.
- Chain lubrication: Wipe and re-lube every 100–150 miles. Use wet lube for rain, dry lube for dust.
- Quick releases and bolts: Ensure wheels, stem, and seatpost are tight. A loose stem can cause sudden steering failure.
Invest in a basic toolkit: tire levers, spare tube, mini pump, multi-tool, and chain checker. These cost under $50 and can save you from a long walk home.
Plan Your Route for Maximum Enjoyment and Safety
Use free tools like Ride with GPS or Komoot to plan routes with minimal traffic, smooth pavement, and reliable services. Look for roads with bike lanes, low speed limits, and cafes or rest stops every 20–30 miles.
Avoid highways and busy urban streets. Rural backroads often offer quieter, more scenic routes with less stop-and-go riding, which improves average speed and reduces fatigue.
Download offline maps in case of poor signal. Carry a paper map or cue sheet as backup.
Clothing That Enhances Performance
Quality cycling clothing improves comfort and efficiency. A well-padded bib short reduces chafing and supports core muscles. Look for brands like Pearl Izumi or Endura, which offer durable options under $100.
A breathable jersey with rear pockets keeps you cool and lets you carry snacks, phone, and tools. Avoid cotton—it retains sweat and causes irritation.
For cooler weather, layer with a lightweight wind vest and arm warmers. These are cheaper than a full jacket and easier to adjust on the go.
Train Smarter, Not Just Harder
You don’t need a power meter or structured training plan to improve. Focus on consistency: ride 3–4 times per week, including one long ride (60–100 miles) every 1–2 weeks.
Use the “talk test” to gauge effort: you should be able to speak in short sentences during moderate efforts. If you’re gasping, slow down. Over time, your endurance and speed will increase naturally.
Incorporate one hill climb per week to build strength. Even a 5-minute climb at a steady pace improves leg power and cardiovascular fitness.
Stay Visible and Safe on the Road
Visibility is critical, especially on early morning or evening rides. Use a front white light (steady or flashing) and a red rear light, even in daylight. Bright clothing or reflective vests increase your presence to drivers.
Follow traffic laws: ride with traffic, signal turns, and stop at red lights. Predictable behavior reduces the risk of accidents.
Carry ID, emergency contact info, and a basic repair kit. Let someone know your route and expected return time.
Final Tips for a Successful Long Ride
Start early to avoid heat and traffic. Eat a light breakfast with carbs and protein 1–2 hours before riding. Begin at a conversational pace for the first 10 miles to warm up.
Take short breaks every 20–30 miles to stretch, refuel, and check your bike. Use rest stops to stand, walk, and hydrate—this prevents stiffness and improves circulation.
Finish strong by cooling down with 10–15 minutes of easy spinning. Stretch your quads, hamstrings, and hips to reduce soreness.
Conclusion
This road cycling guide proves that better speed, comfort, and control don’t require expensive gear or elite training. By focusing on smart bike fit, value-driven upgrades, efficient technique, and proper preparation, weekend riders can enjoy longer, faster, and more confident rides. Prioritize comfort and control, maintain your equipment, and fuel wisely—your body and your wallet will thank you.
FAQ
What’s the best tire width for long weekend rides?
28–32mm tires offer the best balance of comfort, speed, and puncture resistance. They absorb road vibrations better than narrower tires and improve grip in corners, especially on rough pavement.
How much should I spend on a road bike for weekend rides?
A $800–$1,200 bike with an aluminum frame and Shimano 105 groupset provides excellent value. It’s durable, reliable, and performs well for 50–100 mile rides without the high cost of carbon components.
Can I improve my speed without buying new gear?
Yes. Better bike fit, smoother pedaling, consistent cadence, and proper nutrition can increase your average speed by 2–4 mph. Technique and preparation often matter more than equipment.