


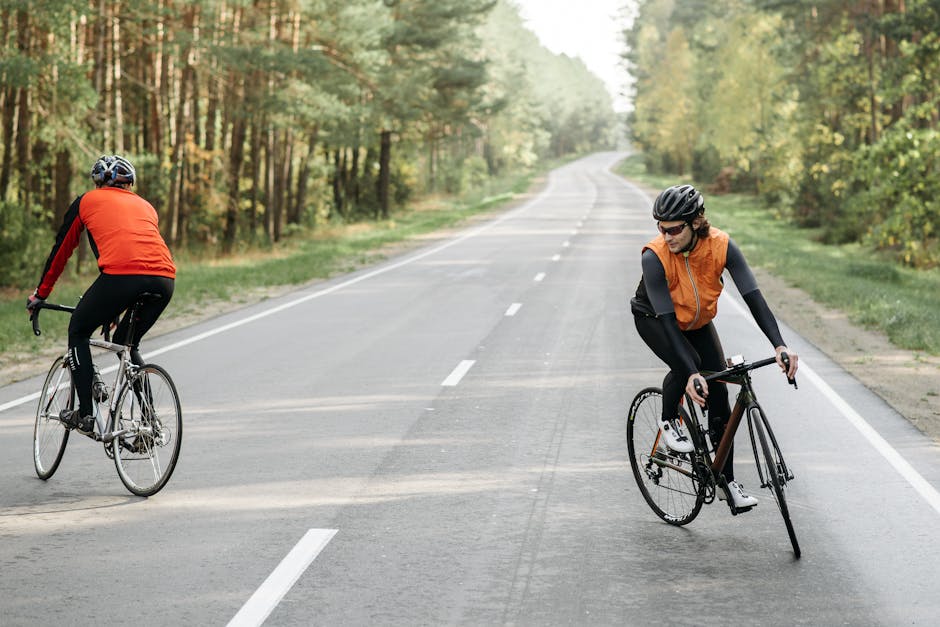
Road Cycling Guide for Beginners Who Want to Train and Ride Smarter with a Focus on Gearing for Weekend Rides Leave a comment
Road Cycling Guide for Beginners Who Want to Train and Ride Smarter with a Focus on Gearing for Weekend Rides
If you’re new to road cycling and eager to make the most of your weekend rides, understanding how to train effectively and use your bike’s gearing system wisely is essential. This road cycling guide for beginners breaks down the fundamentals of smart training, proper bike setup, and—most importantly—how to choose and use gears efficiently so you can ride farther, faster, and with less fatigue. Whether you’re tackling rolling hills or long flat stretches, mastering gear selection will transform your experience from a struggle into an enjoyable, sustainable habit.
Why Gearing Matters for Weekend Road Cyclists
Gears aren’t just for racing cyclists or mountain climbs—they’re your best tool for managing effort, maintaining rhythm, and conserving energy during weekend rides. On a road bike, the gear system allows you to adjust resistance so your pedaling stays smooth and efficient, regardless of terrain or fatigue. For beginners, poor gear selection is one of the most common reasons rides feel harder than they should. Spinning too fast in a high gear or grinding slowly in a low one both waste energy and increase discomfort.
Think of gears like walking up stairs: taking one step at a time is manageable, but trying to leap three at once quickly tires you out. Similarly, using the right gear keeps your cadence—the number of pedal revolutions per minute—in an optimal range, typically between 80 and 100 RPM for most recreational riders. This balance reduces strain on your knees, improves endurance, and helps you maintain a steady pace over longer distances.
Modern road bikes come with two chainrings at the front (usually labeled compact, standard, or semi-compact) and a cassette with 8 to 12 sprockets at the rear. The combination of front and rear gears gives you a wide range of ratios. For weekend rides—often a mix of flats, gentle climbs, and descents—a compact crankset (50/34 teeth) paired with an 11-28 or 11-32 cassette offers the best versatility for beginners. It provides easier low gears for hills without sacrificing top-end speed on descents.
How to Choose the Right Gear for Any Terrain
Selecting the correct gear isn’t about memorizing combinations—it’s about listening to your body and the road. Here’s a practical approach to gear selection based on common riding scenarios:
- Flat roads: Use middle to higher gears (e.g., 50×15 or 50×17). This allows you to maintain speed without spinning out or overworking your legs.
- Gentle inclines (3–5% grade): Shift down one or two gears before you feel strain. A common setup is 34×23 or 34×25. Anticipating the climb is key—don’t wait until you’re already struggling.
- Steeper hills (6–8%): Drop to the small chainring and use the larger rear cogs (34×28 or 34×32). Keep your upper body relaxed and focus on steady, circular pedaling.
- Downhill or tailwinds: Shift up to higher gears (50×11 or 50×13) to take advantage of momentum without over-spinning.
One common mistake beginners make is “cross-chaining”—using the big chainring with the largest rear cog (50×28) or the small chainring with the smallest (34×11). This creates diagonal chain tension, increases wear, and can cause poor shifting. Avoid these extreme combinations unless absolutely necessary.
Another tip: shift gears before you need them. If you’re approaching a hill, shift down early while you’re still on level ground. Shifting under heavy load—like when you’re already climbing—stresses the drivetrain and can lead to missed shifts or chain slip.
Training Smarter: Building Endurance and Strength for Weekend Rides
Smart training doesn’t mean riding harder—it means riding with purpose. As a beginner, your goal should be consistency, not speed. Aim for 2–3 rides per week, gradually increasing duration and distance. Start with 30–45 minute rides at a conversational pace (you should be able to speak in full sentences). This builds aerobic base fitness, which is the foundation of all endurance cycling.
Once you’re comfortable, introduce structured elements into your weekend rides:
- Tempo intervals: Ride at a comfortably hard pace (about 70–80% of max effort) for 5–10 minutes, followed by 5 minutes of easy spinning. Repeat 2–3 times. This improves your lactate threshold and helps you sustain faster speeds.
- Hill repeats: Find a moderate hill (200–400 meters long) and climb it 4–6 times at a steady effort. Recover on the descent. This builds leg strength and teaches your body to handle resistance efficiently.
- Long, steady rides: Once a week, extend your ride by 10–15 minutes. These longer efforts improve fat metabolism and mental endurance.
Always include a 5–10 minute warm-up (easy spinning) and cool-down (light pedaling and stretching). Skipping these increases injury risk and reduces recovery.
Nutrition and hydration are part of training too. On rides over 60 minutes, consume 30–60 grams of carbohydrates per hour (e.g., a banana, energy gel, or sports drink). Drink water regularly—even if you don’t feel thirsty. Dehydration sneaks up quickly, especially on warm days.
Bike Fit and Maintenance: The Foundation of Smart Riding
No amount of smart training or gear knowledge helps if your bike doesn’t fit properly. A poor fit leads to discomfort, inefficiency, and injury. Key areas to check:
- Saddle height: When your heel is on the pedal at the bottom of the stroke, your leg should be almost straight. When pedaling with the ball of your foot, there should be a slight bend.
- Saddle position: Adjust fore/aft so your knee is directly over the pedal spindle when the crank is horizontal.
- Handlebar reach: You should be able to rest your hands on the hoods with a slight bend in your elbows and relaxed shoulders.
If you’re unsure, visit a local bike shop for a professional fit. It’s a worthwhile investment.
Regular maintenance ensures your gears shift smoothly and your bike performs reliably. At minimum, do the following every few weeks:
- Lubricate the chain with a quality bike-specific lube.
- Check tire pressure (usually 80–100 psi for road tires; refer to sidewall markings).
- Inspect brake pads and cables for wear.
- Clean the drivetrain to remove dirt and grime that affects shifting.
A well-maintained bike shifts more precisely, especially under load—critical when you’re climbing a hill and need a quick downshift.
Essential Gear for Safe and Comfortable Weekend Rides
Beyond the bike itself, a few key pieces of equipment make a big difference:
- Helmet: Non-negotiable. Choose one that fits snugly and meets safety standards (look for CPSC, CE, or AS/NZS certification).
- Clothing: Padded cycling shorts reduce saddle soreness. A moisture-wicking jersey keeps you cool. Avoid cotton—it retains sweat and causes chafing.
- Footwear: Stiff-soled cycling shoes improve power transfer. Beginners can start with flat pedals and regular sneakers, but clipless pedals (with compatible shoes) offer better efficiency once you’re ready.
- Accessories: Front and rear lights (even during the day), a basic repair kit (spare tube, pump, multitool), and a water bottle cage are must-haves.
Visibility matters. Wear bright or reflective clothing, especially on early morning or evening rides. Assume drivers don’t see you—ride predictably and follow traffic rules.
Planning Your Weekend Ride: Routes, Pace, and Group Etiquette
Weekend rides are more enjoyable when you plan ahead. Use apps like Strava, Komoot, or Ride with GPS to find popular local routes. Look for roads with bike lanes, low traffic, and minimal stoplights. Start with loops of 15–25 km and gradually increase distance.
Pace yourself. It’s easy to get caught up in group speed, especially if riding with others. Stick to a sustainable effort level—your goal is to finish strong, not exhaust yourself in the first 10 minutes. Use perceived exertion: if you’re gasping for air, you’re going too hard.
If riding in a group, follow basic etiquette:
- Call out hazards (“car back,” “pothole,” “slowing”).
- Ride in a straight line, not side-by-side, unless the road is wide and safe.
- Signal turns and stops with hand signals.
- Don’t overlap wheels with the rider in front—a sudden brake could cause a crash.
Respect other road users. Yield to pedestrians, don’t run red lights, and thank drivers who give you space.
Common Mistakes Beginners Make—And How to Avoid Them
Even with good intentions, new riders often fall into predictable traps:
- Overgearing: Pedaling too slowly in a high gear strains knees and burns out quads. Shift down and spin more.
- Ignoring cadence: Focus on smooth, rhythmic pedaling. Use a cadence sensor or count pedal strokes for 15 seconds and multiply by 4 to check RPM.
- Skipping rest days: Recovery is when your body adapts and gets stronger. Take at least one full rest day per week.
- Riding the same route every time: Vary terrain and distance to build different skills and prevent boredom.
- Neglecting bike checks: A loose bolt or worn brake pad can ruin a ride—or cause an accident. Do a quick pre-ride check: tires, brakes, chain, and quick releases.
Remember: progress isn’t linear. Some rides will feel easy; others will be tough. That’s normal. Focus on consistency, not perfection.
Taking Your Riding to the Next Level
Once you’ve built a solid base, consider setting specific goals: completing a 50 km ride, climbing a local hill without stopping, or joining a group ride. These milestones keep motivation high and give your training direction.
You might also explore:
- Cycling clubs: Many offer beginner-friendly rides and mentorship.
- Online training plans: Structured programs (like those from TrainerRoad or Zwift) can guide your progress.
- Performance tracking: Use a bike computer or smartwatch to monitor speed, distance, heart rate, and elevation.
But don’t rush. The joy of road cycling lies in the journey—the rhythm of the pedals, the wind in your face, the scenery rolling by. Train smart, ride with intention, and let your weekend rides become a rewarding part of your lifestyle.
FAQ
What gear should I use when starting up a hill?
Shift to the small chainring (front) and a larger rear cog (e.g., 34×25 or 34×28) before you begin climbing. This gives you lower resistance so you can maintain a steady cadence without straining your legs.
How often should I shift gears during a ride?
Shift as needed—before climbs, when accelerating, or if your legs feel fatigued. There’s no set frequency. The goal is to keep your pedaling smooth and efficient, not to hit every gear.
Can I use a hybrid bike for road cycling?
Yes, but road bikes are more efficient for paved surfaces due to lighter frames, drop handlebars, and narrower tires. A hybrid can work for casual weekend rides, but you’ll notice a difference in speed and comfort on longer distances.