


Road Cycling Guide for Understanding Fit, Gearing, and Frame Options with a Focus on Comfort for City Streets Leave a comment
Road Cycling Guide for Understanding Fit, Gearing, and Frame Options with a Focus on Comfort for City Streets
Choosing the right road bike for city streets starts with comfort. A proper fit, appropriate gearing, and a suitable frame can transform your daily commute or weekend ride from a jarring ordeal into a smooth, enjoyable experience. This road cycling guide walks you through the essentials—how to dial in your bike fit, select gearing that matches urban terrain, and choose a frame designed for real-world city riding. Whether you’re dodging potholes, stopping at lights, or carrying a backpack, these practical considerations ensure your bike works with you, not against you.
Why Comfort Matters More Than Speed on City Roads
Unlike long-distance touring or competitive racing, city cycling prioritizes control, stability, and rider comfort over raw speed. Pavement quality varies widely—cracks, debris, curbs, and frequent stops demand a bike that absorbs shock and keeps you upright. A stiff, aggressive setup may feel fast on open roads, but it quickly becomes fatiguing in stop-and-go traffic. Comfort doesn’t mean sacrificing performance; it means choosing components and geometry that reduce strain on your back, wrists, and neck over repeated short trips.
Consider posture: an upright position reduces pressure on your hands and lower back, making it easier to scan traffic and react quickly. Many city riders benefit from a slightly shorter reach and higher handlebars compared to traditional road bikes. This relaxed stance improves visibility and reduces fatigue, especially during longer commutes.
Finding the Right Fit: Your Body, Your Bike
A proper bike fit is the foundation of comfort. Even the best components won’t help if your frame size is wrong. Start by measuring your inseam and comparing it to manufacturer sizing charts—most brands provide height ranges, but individual proportions vary. A frame that’s too large forces you to overreach; one that’s too small crowds your knees and limits power transfer.
Key fit adjustments include:
- Saddle height: When seated, your leg should be nearly straight at the bottom of the pedal stroke, with a slight bend (about 25–30 degrees). Too high causes rocking; too low strains knees.
- Saddle position: Slide the saddle forward or backward to align your knee over the pedal spindle when the crank is horizontal. This affects weight distribution and pedaling efficiency.
- Handlebar reach and drop: Shorter stems and riser handlebars reduce reach, easing shoulder and neck tension. For city use, many riders prefer a flat or slightly raised bar over deep-drop racing styles.
Professional bike fits are ideal but not always necessary. Start with online calculators or in-store assessments, then fine-tune based on how your body feels after 15–20 minutes of riding. Pay attention to numb hands, sore shoulders, or lower back pain—these are signs your fit needs adjustment.
Common Fit Mistakes to Avoid
One frequent error is choosing a bike based solely on wheel size or brand reputation. A 56cm frame from Brand A may fit differently than a 56cm from Brand B due to variations in top tube length and head tube angle. Always test ride before buying.
Another pitfall is ignoring flexibility. Older riders or those with tight hips may struggle with aggressive road geometries. In such cases, endurance or gravel-style frames with slacker angles offer more comfort without sacrificing function.
Gearing for Stop-and-Go City Riding
City streets rarely offer long, uninterrupted climbs or descents. Instead, you face frequent stops, moderate hills, and variable traffic flow. Your gearing should reflect this reality—prioritizing ease of acceleration and manageable cadence over high-speed top ends.
Most modern road bikes use either compact or sub-compact cranksets. A compact setup (typically 50/34 teeth) provides lower gears ideal for urban environments. Pair it with an 11-32 or 11-34 cassette, and you’ll have enough range to climb gentle inclines without spinning out on flat stretches.
For flatter cities like Amsterdam or Copenhagen, a single-chainring (1x) drivetrain can simplify shifting and reduce maintenance. However, 1x systems sacrifice some gear range, so they’re less ideal for hilly areas. If you live in a city with rolling terrain—think San Francisco or Pittsburgh—a traditional 2x setup remains the better choice.
Consider internal gear hubs (IGH) if you prioritize low maintenance and cleanliness. Brands like Shimano Alfine or Rohloff offer 8 to 14 speeds in a sealed unit, protected from rain and grime. While heavier and more expensive, IGH systems eliminate derailleur adjustments and are excellent for all-weather commuting.
Gear Ratio Examples for City Use
| Setup | Crankset | Cassette | Best For |
|---|---|---|---|
| Compact 2x | 50/34 | 11-32 | Mixed terrain, moderate hills |
| Sub-compact 2x | 46/30 | 11-34 | Steep hills, loaded commuting |
| 1x Drivetrain | 42T | 10-42 | Flat cities, minimal shifting |
| Internal Hub | Single chainring | 8-speed IGH | Low maintenance, wet climates |
Frame Options: Material, Geometry, and Tire Clearance
The frame is your bike’s backbone—it determines ride quality, durability, and compatibility with accessories. For city riding, prioritize compliance, tire clearance, and mounting points over weight savings.
Frame Materials:
- Steel: Offers a smooth, vibration-damping ride. Ideal for rough pavement. Heavier than other options but highly durable and repairable.
- Aluminum: Lightweight and stiff, but can transmit more road shock. Look for models with curved seat stays or seatpost clamps that add compliance.
- Carbon Fiber: Excellent vibration absorption and tunable stiffness. Higher-end models include seatmast designs and shaped tubing for comfort. Avoid no-name brands—quality varies widely.
- Titanium: Combines steel’s ride quality with aluminum’s lightness. Corrosion-resistant and long-lasting, but expensive.
Geometry Matters: Endurance or sportive frames feature shorter top tubes, taller head tubes, and slacker head angles than race bikes. These traits promote a more upright posture and stable handling—critical when navigating tight turns or sudden obstacles.
Tire Clearance: Wider tires (28c to 35c) run at lower pressures, absorbing bumps and improving grip. Many new road bikes accommodate up to 32c or 35c tires. If your frame only fits 23c or 25c, you’ll feel every crack in the pavement. Check clearance before upgrading tires.
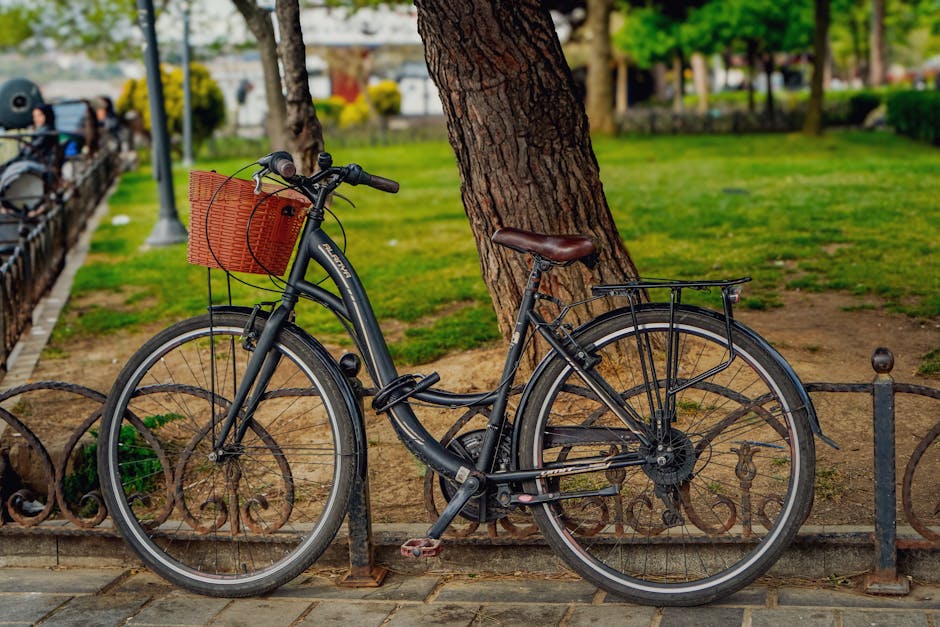
Mounting Points: Practical city bikes include eyelets for fenders, racks, and water bottles. These allow you to carry bags, stay dry in rain, and reduce wear on your clothing. A bike without mounts limits your utility, especially for daily commuting.
Endurance vs. Race Frames: A City Rider’s Choice
Race frames prioritize aerodynamics and stiffness, often at the cost of comfort. Endurance frames, like the Trek Domane, Specialized Roubaix, or Canyon Endurace, feature relaxed geometry, built-in compliance zones, and wider tire clearance. For city use, endurance designs are almost always the better pick.
Gravel bikes blur the line further. With even more tire clearance (up to 45c), stable handling, and mounting options, they’re excellent for mixed-surface riding. If your route includes bike paths, gravel alleys, or poorly maintained streets, a gravel bike may offer the versatility you need.
Accessories That Enhance Urban Comfort
Your bike’s base setup matters, but accessories fine-tune the experience:
- Saddles: Wider, shorter saddles with cutouts reduce perineal pressure. Leather saddles (like Brooks) mold to your shape over time but require breaking in.
- Handlebar Tape: Thick, gel-padded tape absorbs vibrations. Look for cork or silicone-based options.
- Suspension Seatposts: Models like Cane Creek’s Thudbuster add compliance without changing your frame.
- Fenders: Keep you dry and protect your drivetrain from water and salt.
- Panniers or Front Racks: Distribute weight better than backpacks, reducing sweat and shoulder strain.
Even small changes—like switching to ergonomic grips or adding reflective tape—can improve safety and comfort during daily rides.
Test Rides and Final Considerations
Never buy a city road bike without riding it. Visit local shops and test multiple models on real streets—not just parking lots. Pay attention to how the bike handles at low speeds, how easily you can put a foot down, and whether shifting feels intuitive in traffic.
Ask about warranty coverage, service plans, and compatibility with future upgrades. A bike that’s easy to maintain will stay comfortable longer.
Budget wisely. A $1,200 bike with good fit and components often outperforms a $2,000 race-oriented model in city conditions. Focus spending on frame quality, gearing, and tires—not flashy paint or ultra-light wheels.
Conclusion
A comfortable city road bike starts with the right fit, gearing that matches your terrain, and a frame built for real-world conditions. This road cycling guide emphasizes practical choices—upright posture, wide tires, reliable shifting, and durable materials—that make daily riding enjoyable and sustainable. Prioritize function over form, and your bike will reward you with smoother commutes, less fatigue, and more confidence on urban streets.
FAQ
What’s the best tire width for city road cycling?
28c to 32c tires offer the best balance of speed, comfort, and puncture resistance on city streets. Wider tires (up to 35c) are better for rough pavement or carrying loads.
Can I use a racing bike for daily commuting?
Technically yes, but it’s not ideal. Racing bikes have aggressive geometry, narrow tires, and limited mounting points—making them less comfortable and practical for stop-and-go urban riding.
How often should I adjust my bike fit?
Reassess your fit every 6–12 months or after significant changes in flexibility, weight, or riding frequency. Small tweaks can prevent long-term discomfort.