

Beginner Bicycle Buying Guide That Helps You Avoid Costly Mistakes for Daily Commuting Leave a comment
Beginner Bicycle Buying Guide That Helps You Avoid Costly Mistakes for Daily Commuting
Choosing your first bicycle for daily commuting doesn’t have to be overwhelming—or expensive. A well-chosen bike can save you money, reduce stress, and make your daily rides efficient and enjoyable. This beginner bicycle buying guide walks you through essential factors like frame type, gearing, tire width, and fit to help you avoid common pitfalls. Whether you’re navigating city streets or suburban roads, the right bike will match your route, budget, and physical needs. We’ll cover what to prioritize, what to skip, and how to test before you buy—so you make a smart, long-lasting investment.
Why Efficiency Matters in a Commuter Bike
Efficiency isn’t just about speed—it’s about how smoothly and comfortably you can complete your daily ride with minimal effort and maximum reliability. A bike that’s efficient for commuting reduces fatigue, handles traffic and weather, and requires less maintenance. For beginners, this means focusing on practical design elements that support consistent use over flashy features that add weight or complexity.
Key efficiency factors include:
- Lightweight frame: Aluminum frames offer a good balance of durability and weight for most commuters.
- Appropriate gearing: Enough gears to handle hills without overcomplicating shifting.
- Rolling resistance: Wider tires with moderate tread reduce effort on pavement.
- Upright riding position: Reduces strain on your back and shoulders during stop-and-go traffic.
For example, a hybrid bike with a step-through aluminum frame, 7–8 speeds, and 32mm tires will typically outperform a heavy mountain bike with suspension on city streets—even if the mountain bike looks more rugged.
Step 1: Determine Your Commute Profile
Before shopping, map out your typical ride. Answer these three questions:
- Distance: How many miles is your one-way trip? Rides under 5 miles favor lighter bikes; longer commutes may benefit from comfort features.
- Terrain: Are you riding flat roads, hills, or a mix? Steep inclines require lower gears.
- Storage and parking: Will you need to carry the bike upstairs or lock it outdoors all day? Weight and weather resistance matter here.
A 3-mile flat commute through downtown might suit a lightweight hybrid or city bike. A 7-mile hilly route with bike lanes could call for a fitness hybrid with wider gear range. Matching your bike to your route prevents frustration and wasted money.
Step 2: Choose the Right Bike Type
Not all bikes are built for commuting. Here’s how common types compare for daily use:
| Bike Type | Best For | Commuting Pros | Commuting Cons |
|---|---|---|---|
| Hybrid | Mixed terrain, city roads | Upright position, versatile tires, often includes mounts for racks | Slightly heavier than road bikes |
| City/Urban | Short city trips, errands | Step-through frames, fenders, chain guards, built-in lights | Limited gear range, not ideal for long distances |
| Road Bike | Long, fast rides on pavement | Lightweight, efficient on smooth roads | Aggressive posture, thin tires prone to punctures, fewer mounting points |
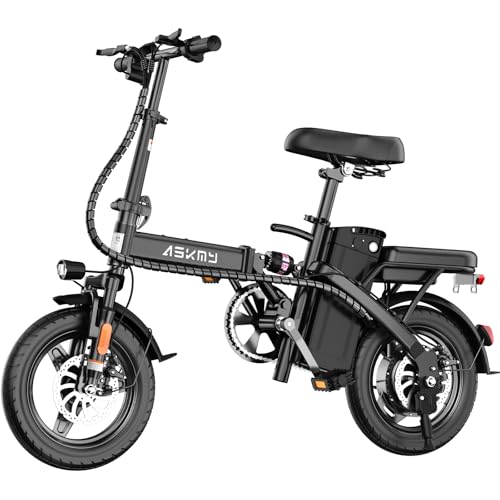
| Folding Bike | Multi-modal commutes (bike + transit) | Compact, easy to store and carry | Smaller wheels reduce stability and comfort on rough roads |
For most beginners, a hybrid or city bike offers the best balance of comfort, practicality, and efficiency. Avoid full-suspension mountain bikes unless your route includes significant off-road sections—they’re overbuilt for pavement and slow you down.
Step 3: Prioritize Fit Over Features
A bike that doesn’t fit properly will feel uncomfortable, inefficient, and potentially unsafe—no matter how advanced its components. Many beginners make the mistake of choosing a bike based on price or looks, only to regret it after a few rides.
To ensure a good fit:
- Stand over the top tube: You should have 1–2 inches of clearance for road bikes, 3–4 inches for hybrids.
- Check reach to handlebars: When seated, your arms should be slightly bent, not fully extended or cramped.
- Adjust saddle height: Your leg should be almost straight at the bottom of the pedal stroke, with a slight bend.
Most bike shops offer free fitting consultations. If buying online, use the manufacturer’s size chart and consider a professional fit afterward. A $50 adjustment now can prevent months of discomfort.
Step 4: Understand Gearing Without Overcomplicating It
Gears help you maintain a steady pedaling rhythm across different speeds and terrains. But more gears don’t always mean better performance—especially for beginners.
Here’s what you need to know:
- Single-speed: Simple and low-maintenance, ideal for flat areas. Avoid if you encounter hills.
- 7–8 speed: Sufficient for most city commutes with mild hills. Easy to use and reliable.
- 16+ speed: Overkill for short rides. Adds weight and complexity without real benefit for daily commuting.
Internal gear hubs (like those from Shimano Nexus or Rohloff) are another option. They’re enclosed, require less maintenance, and allow shifting while stopped—great for traffic-heavy routes. However, they add cost and weight, so they’re best for riders who prioritize convenience over speed.
Step 5: Tires Matter More Than You Think
Tire choice directly affects comfort, speed, and puncture resistance. Many beginners overlook this, but it’s one of the easiest ways to improve efficiency.
For commuting, aim for:
- Width: 28mm to 35mm. Wider than road bike tires but narrower than mountain bike knobbies.
- Tread: Smooth or lightly patterned. Avoid aggressive tread—it increases rolling resistance on pavement.
- Puncture protection: Look for tires labeled “puncture-resistant” or with reinforced casings (e.g., Schwalbe Marathon, Continental Contact).
Example: A 32mm Schwalbe Marathon tire rolls nearly as fast as a 25mm racing tire but resists flats far better—critical when you’re relying on your bike to get to work every day.
Step 6: Don’t Skip Essential Accessories
A bike isn’t commute-ready out of the box. These accessories are worth the investment:
- Fenders: Keep you dry and clean in wet weather. Clip-on versions work if your bike lacks mounts.
- Rear rack and panniers: More comfortable and stable than a backpack for carrying items.
- Lights: Front white and rear red lights are legally required in many areas and vastly improve safety.
- Lock: A U-lock or heavy chain deters theft. Never rely on cable locks alone.
- Bell or horn: Helps alert pedestrians and other cyclists.
Budget at least $100–$150 for accessories. Some bikes come with mounts for these items—check before buying.
Step 7: Set a Realistic Budget
You don’t need to spend $1,000 to get a reliable commuter bike, but going too cheap can lead to frustration. Here’s a practical breakdown:
- $300–$500: Entry-level hybrids from reputable brands (e.g., Trek FX, Giant Escape). Good for light use.
- $500–$800: Sweet spot for most commuters. Better components, lighter frames, and often include useful mounts.
- $800+: Premium materials and features, but diminishing returns for daily commuting unless you have specific needs.
Avoid department store bikes under $300. They often use heavy frames, poor-quality parts, and incorrect assembly—leading to frequent repairs and early replacement.
Step 8: Test Ride Before You Buy
Never buy a bike without riding it first. A test ride reveals issues that specs alone can’t show: stiffness in the frame, brake responsiveness, gear smoothness, and overall comfort.
During your test:
- Ride on a surface similar to your commute (pavement, slight incline).
- Shift through all gears.
- Brake firmly at low speed—should stop quickly without squealing or slipping.
- Check for wobbles or unusual noises.
If shopping online, choose retailers with generous return policies (e.g., 30-day test period). Some local shops also offer rental-to-own programs for commuters.
Common Mistakes to Avoid
Even with research, beginners often fall into these traps:
- Ignoring weather resistance: If you ride in rain, fenders and a chain guard are non-negotiable.
- Overlooking maintenance needs: Disc brakes perform better in wet conditions but cost more to service than rim brakes.
- Buying based on looks: A sleek carbon frame won’t help if the geometry doesn’t suit your body.
- Skipping the helmet: Safety gear is part of the total cost—don’t forget it.
Remember: the best commuter bike is the one you’ll actually ride every day—not the one with the most features.
Final Checklist Before Purchase
Use this quick list to confirm you’re ready:
- ✅ Commute distance and terrain assessed
- ✅ Bike type matches your needs (hybrid or city recommended)
- ✅ Frame size fits your height
- ✅ Gearing suits local hills
- ✅ Tires are 28–35mm with low rolling resistance
- ✅ Mounts for fenders, rack, and water bottle present
- ✅ Test ride completed
- ✅ Accessories budget included
- ✅ Helmet and lock purchased or planned
FAQ
What’s the most important feature in a commuter bike for beginners?
Fit and comfort are the most important. A bike that feels good to ride will encourage consistent use, while a poorly fitting bike leads to discomfort and abandonment—even if it has high-end components.
Can I use a mountain bike for daily commuting?
Yes, but it’s not ideal. Mountain bikes are heavier, have knobby tires that slow you down on pavement, and often lack mounts for racks or fenders. If you already own one, consider switching to smoother tires for better efficiency.
How much should I spend on my first commuter bike?
Aim for $500–$800 for a reliable, efficient bike that will last several years. This range offers good components, lighter frames, and practical features without overspending on unnecessary upgrades.
Conclusion
This beginner bicycle buying guide helps you avoid costly mistakes by focusing on efficiency, fit, and practicality for daily commuting. Start by understanding your route, choose a hybrid or city bike that matches your needs, prioritize proper sizing, and don’t skip essential accessories. A well-chosen bike pays for itself in saved transit fares, reduced stress, and improved health. Take your time, test ride multiple options, and invest in a bike that supports your daily routine—not one that looks impressive in the showroom.
Related keywords: Beginner bicycle buying guide that helps you avoid costly mistakes with a focus on efficiency for daily commuting.
