


Road Cycling Guide for Beginners Who Want to Train and Ride Smarter with a Focus on Durability for Weekend Rides Leave a comment
Road Cycling Guide for Beginners Who Want to Train and Ride Smarter with a Focus on Durability for Weekend Rides
If you’re new to road cycling and want to build endurance, improve performance, and enjoy longer weekend rides without burning out, this road cycling guide for beginners is built for you. The goal isn’t just to ride more—it’s to ride smarter. By focusing on durability—your body’s ability to sustain effort over time—you’ll avoid common pitfalls like overtraining, injury, and fatigue. This guide walks you through essential training principles, bike setup, nutrition, recovery, and route planning so you can confidently tackle weekend rides of 50+ miles with consistency and comfort.
Why Durability Matters More Than Speed for New Cyclists
Many beginners fixate on speed or distance too early, pushing hard on every ride and burning out within weeks. But long-term progress in road cycling comes from durability—the ability to ride regularly, recover well, and handle increasing mileage without breaking down. Think of it like building a foundation: speed and power come later. Durability keeps you on the bike week after week.
For weekend riders, durability means showing up fresh, not sore or exhausted. It means your knees don’t ache after 30 miles, your back isn’t stiff, and you’re not reaching for the ibuprofen by mile 40. It’s about sustainable effort, not heroic efforts that leave you sidelined.
Start with consistency over intensity. Aim to ride 2–3 times per week, even if it’s just 15–20 miles. Your body adapts to the demands you place on it—so gradual increases in time and distance build resilience. A 10% weekly mileage increase is a safe rule of thumb. Going from 30 to 45 miles in one weekend might feel rewarding, but it also increases injury risk and recovery time.
Essential Gear for Comfort and Longevity
Your bike and equipment directly affect how your body handles long rides. A poorly fitted bike or low-quality components can lead to discomfort, numbness, or even long-term issues like nerve damage or joint pain. Investing in the right setup early pays off in durability and enjoyment.
Bike Fit: The Foundation of Comfort
A proper bike fit isn’t a luxury—it’s a necessity. Even a high-end road bike will feel punishing if the saddle is too high, the reach is too long, or the handlebars are too low. Many bike shops offer professional fitting services, but here are the basics to check yourself:
- Saddle height: When your foot is at the bottom of the pedal stroke, your leg should be nearly straight with a slight bend (about 25–30 degrees).
- Saddle position: Adjust fore/aft so your knee is directly over the pedal spindle when the crank is horizontal.
- Handlebar reach: You should be able to rest your hands on the hoods without straining your back or shoulders.
Even small adjustments can make a big difference. A saddle that’s 5mm too high can cause hip rocking and lower back pain over time.
Choosing the Right Tires and Pressure
Tires are your first line of defense against road vibrations and fatigue. Beginners often ride on narrow, high-pressure tires (like 23c at 120 psi), which transmit every bump directly to your hands, arms, and spine. Modern road bikes support wider tires—25c to 28c—which run at lower pressures and absorb road shock better.
For weekend rides on mixed pavement, 25c or 28c tires at 80–90 psi (front) and 85–95 psi (rear) offer a smoother, more durable ride. Tubeless setups or puncture-resistant tires like the Continental Grand Prix 5000 or Vittoria Corsa also reduce the risk of flats, so you spend less time fixing and more time riding.
Clothing That Supports Endurance
Padded cycling shorts are non-negotiable for rides over 20 miles. Look for bib shorts with a high-density chamois—brands like Pearl Izumi, Castelli, or Rapha offer beginner-friendly options. Avoid cotton; moisture-wicking fabrics keep you dry and prevent chafing.
A well-ventilated helmet, gloves with gel padding, and sunglasses with UV protection complete the essentials. Don’t forget a lightweight wind jacket for cooler mornings—layering keeps your core temperature stable, which helps maintain endurance.
Building a Smart Training Plan for Weekend Riders
You don’t need a coach or a power meter to train effectively. A simple, structured plan focused on building aerobic base and muscular endurance will prepare you for longer weekend rides without overloading your schedule.
Weekly Structure: Quality Over Quantity
Most beginners can manage 3–4 rides per week. Here’s a sample weekly plan that prioritizes durability:
| Day | Ride Type | Duration | Purpose |
|---|---|---|---|
| Tuesday | Easy spin | 45–60 min | Recovery, aerobic base |
| Thursday | Tempo or intervals | 60–75 min | Build endurance and strength |
| Saturday | Long ride | 2–3 hours | Simulate weekend conditions |
| Sunday | Rest or light spin | 30 min or off | Active recovery |
The long ride is your cornerstone. Start with 1.5 hours and add 10–15 minutes each week. Include hills if your weekend route has them—climbing builds leg strength and cardiovascular fitness. But avoid sprinting or high-intensity efforts on long days; keep the effort conversational (you should be able to speak in short sentences).
Interval Training Without Overdoing It
Intervals improve your stamina and efficiency, but beginners often do too much too soon. Start with simple efforts:
- Steady climbs: 3–5 repeats of 3–5 minutes at a moderate effort (7/10), with equal recovery.
- Tempo intervals: 2–3 sets of 10 minutes at a sustained pace (you can talk, but it’s hard), with 5 minutes easy between sets.
Avoid VO2 max or anaerobic intervals (like 30-second sprints) until you’ve built a solid base. These are stressful on the body and increase injury risk if done too frequently.
Nutrition and Hydration for Endurance
What you eat before, during, and after rides directly impacts your durability. Even mild dehydration or low glycogen can cause fatigue, cramping, or “bonking” (sudden energy crash).
Pre-Ride Fueling
Eat a balanced meal 2–3 hours before a long ride: complex carbs (oats, rice, whole grain bread), moderate protein, and low fat. Example: oatmeal with banana and peanut butter, or toast with eggs and avocado. Avoid high-fiber or high-fat foods that can cause stomach upset.
If you’re short on time, a banana with a handful of almonds 30–60 minutes before riding provides quick energy without heaviness.
On-the-Bike Nutrition
For rides under 90 minutes, water may be enough. But for weekend rides over 2 hours, you need fuel. Aim for 30–60 grams of carbohydrates per hour. Options include:
- Energy gels (e.g., GU, Clif)
- Electrolyte drinks (e.g., Nuun, Skratch Labs)
- Bananas, dates, or homemade bars
Don’t wait until you’re hungry. Eat small amounts every 20–30 minutes. Practice your nutrition strategy on training rides—what works in theory may not sit well at mile 40.
Post-Ride Recovery
Within 30–60 minutes after finishing, consume a mix of carbs and protein (3:1 ratio) to replenish glycogen and repair muscles. A smoothie with milk, banana, and protein powder, or chocolate milk and a sandwich, works well.
Hydrate with water and electrolytes. Weigh yourself before and after long rides—for every pound lost, drink 16–20 oz of fluid.
Recovery: The Hidden Key to Durability
Many beginners treat recovery as optional. It’s not. Recovery is when your body adapts and gets stronger. Without it, you plateau or regress.
Sleep and Rest Days
Aim for 7–9 hours of sleep per night. Sleep is when growth hormone peaks and tissue repair accelerates. Schedule at least one full rest day per week—no riding, no cross-training. Light walking or stretching is fine, but avoid adding stress.
Active Recovery
On light days, a 30–45 minute easy spin at low intensity (50–60% max heart rate) increases blood flow to muscles, helping clear lactate and reduce soreness. Think of it as “flushing” your legs.
Stretching and Mobility
Focus on hips, hamstrings, quads, and lower back. Dynamic stretches before rides (leg swings, hip circles) prepare your body. Static stretches after rides improve flexibility. A foam roller can help with tight IT bands or glutes.
Consider adding 10–15 minutes of core work 2–3 times per week. Planks, bird-dogs, and dead bugs build stability, which reduces fatigue on long rides.
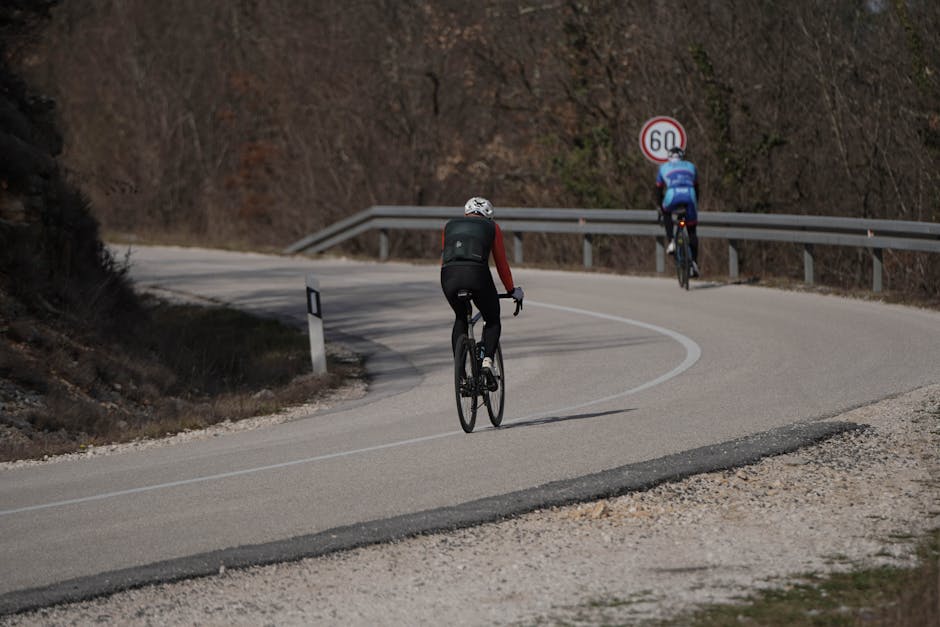
Route Planning and Safety for Weekend Rides
Smart route planning reduces stress and increases enjoyment. A well-chosen route matches your fitness level, minimizes traffic, and includes safe stopping points.
Choosing the Right Terrain
Start with flat or gently rolling roads. As your endurance improves, add hills gradually. Use apps like Strava, Komoot, or Ride with GPS to preview elevation profiles and road conditions. Look for routes with bike lanes or low-traffic roads.
Avoid busy highways or roads with poor pavement. Potholes and debris increase the risk of crashes or mechanical issues.
Safety Essentials
Always wear a helmet. Use front and rear lights, even during the day—drivers often miss cyclists. Wear bright or reflective clothing.
Carry a basic repair kit: spare tube, tire levers, mini pump or CO2 inflator, multitool, and phone. Learn how to fix a flat before you need to. A simple 10-minute practice at home can save you an hour on the roadside.
Let someone know your route and expected return time. For remote rides, consider a GPS tracker or sharing your location via phone.
Common Mistakes That Undermine Durability
Even with good intentions, beginners often make errors that compromise long-term progress. Avoid these pitfalls:
- Skipping warm-ups: Jumping into a hard ride stresses muscles and increases injury risk. Spend 5–10 minutes spinning easy before increasing effort.
- Ignoring pain: Mild soreness is normal. Sharp or persistent pain is not. Knee pain, numbness in hands or feet, or lower back pain signal a problem—adjust your fit or reduce intensity.
- Riding through illness or fatigue: Rest when you’re sick or overly tired. Overtraining weakens your immune system and delays recovery.
- Neglecting bike maintenance: A poorly maintained bike feels sluggish and increases mechanical risk. Check tire pressure, chain lubrication, and brake function weekly.
Progressing Safely: When to Increase Mileage
Building durability is a marathon, not a sprint. Follow these guidelines to advance without breaking down:
- Consistency first: Ride regularly for 4–6 weeks before increasing distance.
- 10% rule: Add no more than 10% to your longest ride each week.
- Listen to your body: If you’re sore for more than 2 days or feel unusually tired, take an extra rest day.
- Peak and taper: Before a big weekend event or century ride, reduce volume by 30–50% in the final week to arrive fresh.
For example, if your longest ride is 40 miles, aim for 44 miles the next week—not 60. Small, steady gains build resilience.
Final Thoughts: Ride Smarter, Not Just Harder
This road cycling guide for beginners emphasizes durability because lasting progress comes from sustainable habits, not short-term intensity. By focusing on proper fit, smart training, nutrition, recovery, and safety, you’ll build the foundation to enjoy weekend rides for years to come.
Remember: every cyclist was a beginner once. The ones who stick with it aren’t always the strongest—they’re the ones who ride smart, recover well, and show up consistently. Start where you are, trust the process, and let durability carry you further.
FAQ
How often should I ride as a beginner?
Aim for 2–3 rides per week, including one longer weekend ride. Consistency builds durability faster than occasional long efforts.
Do I need a expensive bike to start road cycling?
No. A well-maintained entry-level road bike (e.g., $800–$1,200) is sufficient. Focus on fit and comfort over high-end components.
What should I do if I feel pain during a ride?
Stop and assess. Adjust your position, reduce intensity, or end the ride if pain persists. Persistent pain may indicate a fit issue or overuse injury—consult a professional if needed.