


Road Cycling Guide for Climbing, Descending, and Pacing More Efficiently with a Focus on Storage for City Streets Leave a comment
Road Cycling Guide for Climbing, Descending, and Pacing More Efficiently with a Focus on Storage for City Streets
Whether you’re commuting through busy city streets or exploring hilly urban routes, mastering the fundamentals of road cycling—climbing, descending, and pacing—can transform your ride. This road cycling guide for climbing, descending, and pacing more efficiently with a focus on storage for city streets delivers practical techniques and smart gear strategies to help you ride smoother, faster, and safer. From body positioning on steep inclines to choosing the right storage solutions that don’t compromise handling, we cover what you need to know to optimize performance without sacrificing convenience in urban environments.
Mastering Climbing Technique for City Roads
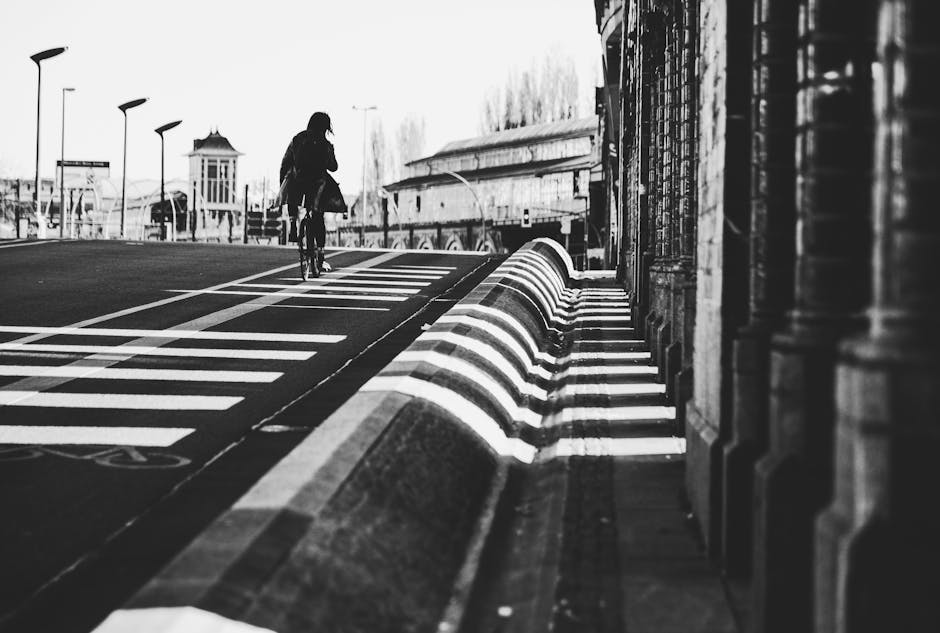
City streets often feature short but steep climbs—think overpasses, bridges, and hilltop intersections. Unlike long mountain ascents, urban climbs demand quick bursts of power and efficient energy management. The key is maintaining momentum while conserving energy for stop-and-go traffic.
Body Position and Pedaling Efficiency
When climbing, shift your weight forward to keep the front wheel grounded, especially on steep inclines. Stay seated for moderate grades to preserve energy, but stand when the gradient exceeds 8–10% or when you need a power boost. Standing allows you to use your body weight to drive the pedals, but it increases fatigue quickly—use it strategically.
Maintain a steady cadence between 70–90 RPM. If your gears allow, shift down before you slow too much. Dropping below 60 RPM on a climb increases strain on your knees and reduces control. Practice “spinning” at a higher cadence on flat sections to build the muscle memory needed for efficient climbing.
Gearing Strategies for Urban Terrain
Most city road bikes come with compact cranksets (50/34T) and wide-range cassettes (11-32T or 11-34T), which are ideal for mixed terrain. If you frequently tackle steep city hills, consider a cassette with a 34T or 36T largest cog. For example, switching from an 11-28T to an 11-34T cassette can make a 10% grade feel significantly more manageable.
Avoid cross-chaining—using the small chainring with the smallest rear cogs—as it increases drivetrain wear and reduces efficiency. Instead, shift to the small chainring early and use the middle-to-large rear cogs for smoother power transfer.
Safe and Controlled Descending on Urban Roads
Descending in the city presents unique challenges: uneven pavement, potholes, traffic signals, and unpredictable vehicles. Speed control and visibility are more important than outright speed.
Body Position for Stability
Lower your center of gravity by bending your elbows, dropping your shoulders, and shifting your weight slightly back. Keep your hands on the brake hoods or drops for maximum control. Avoid locking your arms—this reduces shock absorption and increases the risk of losing traction.
On wet or gravel-strewn descents, reduce speed before the steepest section. Braking on a downhill increases the chance of skidding, especially with rim brakes. Use both brakes evenly: the front brake provides 70% of stopping power, but abrupt use can cause a front-wheel skid or endo (over-the-handlebar fall).
Braking Techniques and Road Awareness
Feather your brakes—apply light, intermittent pressure—rather than gripping hard. This prevents overheating rims and maintains tire grip. On long descents, alternate between short braking bursts and coasting to let rims cool.
Scan ahead for hazards: manhole covers, painted road markings, and wet leaves become slippery at speed. Signal early before turns and check mirrors or shoulder-check for traffic. In heavy urban traffic, it’s often safer to descend at a moderate pace and dismount if necessary.
Pacing Strategies for Efficient Urban Riding
Pacing isn’t just for long-distance rides—it’s essential for city cycling, where frequent stops and starts demand smart energy use. Riding too hard early leads to fatigue before your destination; riding too slow increases exposure to traffic and weather.
Heart Rate and Perceived Effort
Use perceived exertion as a real-time guide. On a scale of 1–10, aim for a 4–6 effort on flat sections and 7–8 on climbs. If you’re gasping or unable to speak in short sentences, you’re overpacing. A heart rate monitor can help, but even without one, pay attention to breathing and muscle fatigue.
For example, if your commute includes three traffic lights and a 300-meter climb, conserve energy before the climb by easing off at the second light. This prevents burnout and ensures you arrive without excessive sweat—important if you’re heading to work.
Using Gears to Maintain Rhythm
Anticipate stops and shifts in terrain. Shift to an easier gear before slowing for a red light so you can accelerate smoothly when the light turns green. This reduces the need for high-torque starts, which drain energy and increase wear on components.
On rolling terrain, use momentum to carry you over small rises. Instead of downshifting and grinding, maintain speed and shift only when necessary. This technique, called “coasting over the top,” keeps your rhythm and reduces fatigue.
Smart Storage Solutions for City Cycling
One of the biggest challenges for urban cyclists is carrying essentials—laptop, lunch, change of clothes—without compromising bike handling. Poorly placed bags can affect balance, increase wind resistance, and make climbing harder.
Frame Bags and Top Tube Storage
Frame bags fit inside the main triangle of your bike and are ideal for tools, snacks, and small electronics. They keep weight low and centered, improving stability on climbs and descents. Look for water-resistant models with easy-access zippers.
Top tube bags mount just behind the stem and are perfect for quick-access items like phones, keys, or energy gels. They don’t interfere with steering and are less likely to shift during hard efforts.
Handlebar and Seatpost Bags
Handlebar bags offer high capacity but can affect front-end handling if overloaded. Use them for lightweight items like jackets or food. Choose models with rigid bases to prevent swaying.
Seatpost-mounted saddle bags are great for tools and spare tubes but should not exceed 1–2 liters. Larger bags can cause the rear wheel to bounce on rough roads. For heavier loads, consider a rear rack with panniers.
Rear Racks and Panniers for Commuting
Rear racks attach to your bike’s frame and support pannier bags on either side. They’re the most stable option for carrying laptops, groceries, or work clothes. Look for racks with a weight limit of at least 25 lbs (11 kg) and compatibility with your bike’s mounting points.
Panniers should be mounted evenly to avoid imbalance. Waterproof models with roll-top closures protect contents in rain. Reflective strips or built-in lights enhance visibility during early morning or evening rides.
Avoid backpack use for long commutes. Even lightweight packs increase upper body fatigue and reduce airflow, leading to overheating. If you must use one, choose a ventilated model with a waist strap to distribute weight.
Integrating Storage with Climbing and Descending Performance
Where you store gear directly impacts your ability to climb and descend safely. Heavy loads on the handlebars or rear can make the bike feel unstable, especially on steep grades or sharp turns.
Weight Distribution Tips
- Keep heavy items low and centered: Place laptops or water bottles in frame or downtube bags.
- Avoid overloading the front: Excess weight on the handlebars reduces steering precision and increases the risk of front-wheel washout on descents.
- Balance side loads: If using panniers, ensure both sides carry similar weight. A 5-lb difference can cause the bike to pull to one side.
- Secure all bags tightly: Loose straps or shifting loads can snag on pedals or wheels, causing accidents.
Test your loaded bike on a quiet hill before commuting. Practice climbing seated and standing, and descend at moderate speed to assess handling. Make adjustments if the bike feels sluggish or unbalanced.
Essential Gear for City Road Cycling
Beyond storage, a few key components enhance safety and efficiency on urban roads.
| Component | Recommendation | Why It Matters |
|---|---|---|
| Tires | 28–32mm width, puncture-resistant | Wider tires absorb road vibrations and reduce flats from debris |
| Brakes | Disc brakes (mechanical or hydraulic) | Better stopping power in wet conditions and on long descents |
| Lights | Front (400+ lumens) and rear (flashing mode) | Essential for visibility in traffic and low-light conditions |
| Fenders | Full-coverage, quick-release | Keep you and your drivetrain clean in wet weather |
Common Mistakes to Avoid
- Riding in the drops on busy streets: This reduces visibility and reaction time. Use the hoods for better control and awareness.
- Ignoring tire pressure: Underinflated tires increase rolling resistance and puncture risk. Check pressure weekly; aim for 80–100 PSI depending on tire width and rider weight.
- Overpacking: Carrying unnecessary items adds weight and complexity. Pack only what you need for the day.
- Skipping pre-ride checks: Always inspect brakes, tire condition, and bag security before heading out.
Final Tips for Efficient Urban Cycling
Efficiency on city roads comes from preparation, technique, and smart gear choices. Practice climbing in different gears, rehearse emergency braking, and test your storage setup on varied terrain. Over time, these habits become second nature, reducing fatigue and increasing confidence.
Remember: the goal isn’t to ride the fastest, but to ride the smartest. A well-paced, well-equipped cyclist arrives fresher, safer, and more in control—whether climbing a bridge, descending a hill, or navigating downtown traffic.
FAQ
What’s the best way to carry a laptop while road cycling in the city?
Use a rear rack with a waterproof pannier or a frame bag if your bike has clearance. Avoid backpacks for long rides, as they cause overheating and shoulder strain. Ensure the laptop is padded and secured to prevent damage from vibrations.
How can I improve my climbing efficiency on short urban hills?
Focus on maintaining a steady cadence (70–90 RPM), shift gears before the climb gets steep, and stay seated when possible. Use standing only for short bursts. Proper gearing (e.g., 11-34T cassette) makes a significant difference.
Is it safe to descend quickly on city streets?
Not recommended. Urban descents often have hazards like potholes, traffic, and pedestrians. Prioritize control over speed—use both brakes evenly, keep your weight back, and reduce speed before turns. Safety always outweighs saving a few seconds.